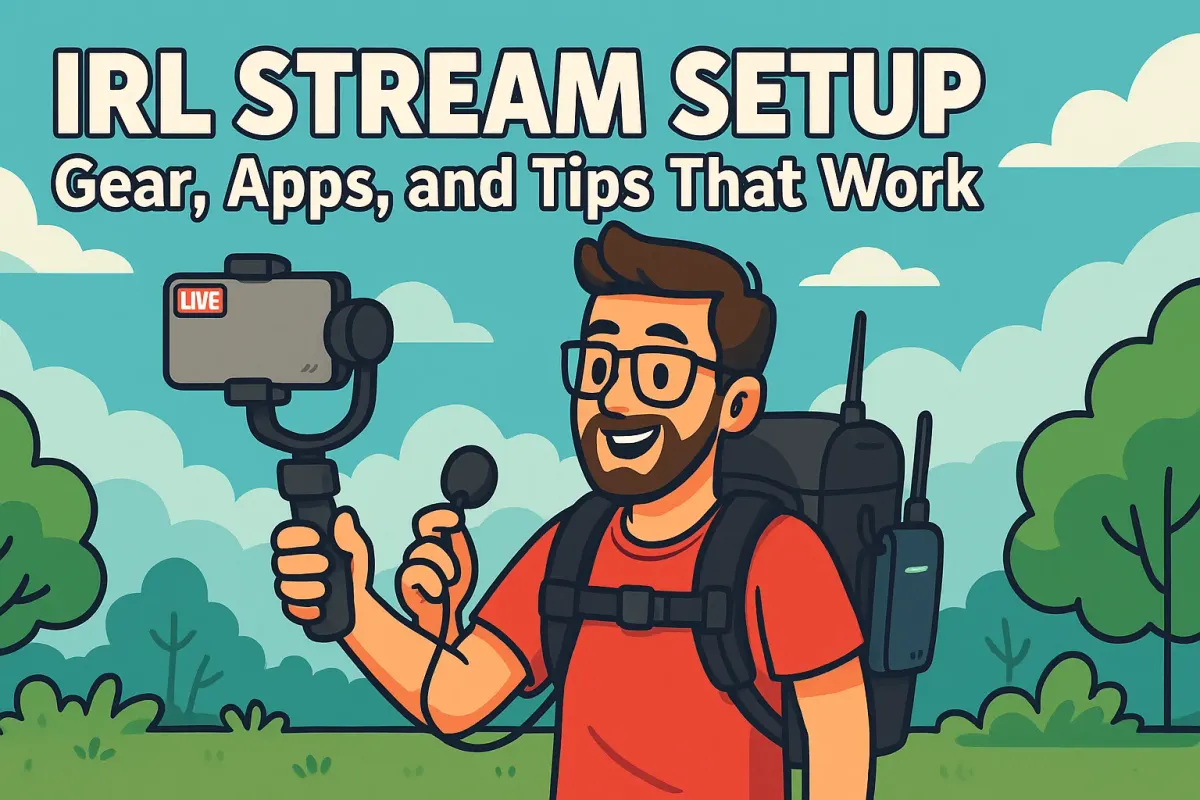
IRL Stream Setup: Gear, Apps, and Tips That Work
Want to take your stream into the real world? This guide breaks down the gear, apps, and tips you actually need for a solid IRL setup. From cameras to hotspots to staying safe on the street, here’s how to stream like a pro wherever life takes you.

What Is an IRL Stream, Really?
Let’s start with the basics: an IRL (In Real Life) stream is exactly what it sounds like... you, live, in the real world, broadcasting as life happens. No green screens. No LED-filled battle stations. Just your camera, your surroundings, and hopefully a strong enough signal to keep the pixels from melting.
Think walking through a night market in Seoul, streaming your thoughts while hiking in the Rockies, or having chaotic conversations at a music festival. If you’ve watched streamers like iShowSpeed, DDG, or FunnyMike, you’ve already seen what IRL streaming can look like when it works, and when it goes completely sideways.
IRL vs. Studio Streams: What’s the Actual Difference?
If you’re used to streaming from your PC setup at home, where your lighting is locked in and OBS feels like a second language, IRL streaming flips the script. You're:
- Mobile, not stationary
- On-the-go, not at a desk
- Dealing with real-world unpredictability: weather, people, noise, dropped signals
There’s no CTRL+Z for a guy moonwalking into your shot during a heartfelt monologue.
But that unpredictability? That’s what makes IRL compelling. It’s raw, unfiltered, and closer to how people actually live and interact.
Why IRL Content Is Blowing Up
Twitch’s IRL category, officially listed as Just Chatting and various Travel & Outdoors sub-genres, has seen 26% month over month growth according to StreamElements' State of the Stream report.
Viewers are craving something more personal, more grounded, more chaotic in a good way.
What Viewers Expect From a Mobile Setup
Let’s be clear: IRL doesn’t mean low effort. If your audio is garbage or your stream drops every 10 minutes, viewers bounce. People still expect:
- Clear visuals (720p minimum, but ideally 1080p)
- Good audio (even in windy or loud environments)
- Stable connection (no one wants buffering mid-rant)
- Interaction. Chat still wants to be seen, heard, and memed with
Also, if you're walking for miles and never switch angles, it gets stale fast. Your gear and flow need to adapt.
Core IRL Streaming Gear You Actually Need
Before you even hit “Go Live,” your IRL stream lives or dies by your gear. You’re basically building a mobile broadcast studio but one that fits in a backpack and runs off of batteries.
Here’s what I’ve personally used, abused, and learned to depend on.
Camera or Phone: What’s Best for IRL Streams?
You’ve got three main contenders:
iPhone 15 Pro (or flagship Android)
- Pros: Stream ready, built-in LTE/5G, great image quality, seamless with Streamlabs or Prism Live.
- Cons: Battery drains fast, heats up like a waffle iron, and camera shake is brutal without a gimbal.
GoPro Hero12 Black
- Pros: Ultra-wide shots, durable, weatherproof, excellent stabilization.
- Cons: Needs a capture card or third-party app (like the GoPro Quik app or Camera Suite), audio quality is meh, and live streaming can be finicky.
Insta360 X3
- Pros: Insane 360-degree shots, post-edit reframing, stabilization magic.
- Cons: Steeper learning curve, can’t monitor chat easily, more of a secondary cam than a main.
Mounts & Gimbals: The MVPs You Don’t See
Look, no one wants to watch a stream that feels like it was shot during a 5.5 earthquake. A stabilizer is your silent MVP.
I used to think a basic selfie stick was enough… until I tried streaming a forest trail. Every bump, branch, and step turned my stream into a vomit simulator. That’s when I grabbed the DJI Osmo Mobile 6 — total game-changer.
Top Picks:
- DJI Osmo Mobile 6 (for phones): Rock-solid, compact, good battery.
- Hohem iSteady Pro 4 (for GoPro): Budget-friendly but stable.
- Ulanzi Claw Quick Release Mount: If you switch rigs mid-stream, this is a lifesaver.
Power Banks: Your Lifeline on the Street
If your gear dies, your stream dies. I don’t care how good your content is.
no power = no viewers.
Recommended:
- Anker PowerCore 737 (massive capacity, fast charge)
- Zendure SuperTank Pro (also charges laptops and modems)
- Always carry short, high-quality USB-C cables. Long spaghetti cords get tangled fast.
Audio Gear: Don’t Let Your Mic Betray You
People will tolerate potato video before they tolerate bad audio. I tested at least five lav mics before landing on one that didn’t kill my phone battery and still picked up my voice in a crowd.
What worked:
- RØDE Wireless GO II: Expensive but clutch. Dual mic setup is great for interviews.
- Sennheiser XS Lav Mobile: Budget option, solid clarity, TRRS compatibility.
- Shure MV88+: If you're going the Lightning port route.
And please, use a deadcat or foam windscreen. One gust of wind and your viewers are gone.
IRL Backpacks: Your Studio on Your Shoulders
I’ll be honest: IRL backpacks are an investment. They’re designed to hold multiple modems, power distribution hubs, cameras, and cooling systems. The pros use LiveU Solo units that bond multiple SIMs for a flawless stream, but they’re $$$.
If you're ready to spend, Check out the Gunrun IRL Backpack. They come with:
- LiveU Solo PRO Bonding Encoder
- Power X1 99Wh External Battery
- Sony FDR-X3000 Action Cam (Optional)
- 2 or 4 Solo Connect modem (optional)
Pretty hardcore, but it makes the difference between “watchable” and “sponsored-stream-worthy.” If you’re not ready to buy, look into rental options or build a DIY setup with a MOLLE backpack and velcroed battery banks.
Your gear doesn’t have to be top-tier, but it does have to be reliable. Because when you’re mid-stream, halfway up a trail, and your mic dies, you either fix it fast, or you lose the audience.
Data Plans, Bonding, and Network Tips
Streaming from your bedroom is easy.
You’ve got Wi-Fi, maybe even Ethernet. But the second you go mobile, your internet becomes the weakest link — and your stream is only as good as your upload speed. Nothing kills the vibe faster than a frozen face and a stream that sounds like a dying robot.
I’ve been there. Its never fun when the signal cuts out mid stream. Never again.
Let’s talk about keeping your connection alive and stable, no matter where you're streaming from.
How to Avoid Getting Throttled Mid-Stream
Throttling is the hidden assassin of IRL streams. You might have “unlimited” data, but if your carrier caps high-speed after a few gigs, your 1080p stream turns into pixel sludge. Always check the fine print on your plan.
What I do now:
- Use carrier-specific unlimited data plans with high-priority access (e.g., T-Mobile’s Magenta MAX or Verizon’s 5G Get More)
- Rotate between SIMs when I’m doing long sessions (one for morning, one for night)
- Run a real-time speed test using apps like Meteor or nPerf before I go live
And always have a backup.
SIM Cards vs. Unlimited Plans: Japan vs. NYC
Different countries, different headaches.
In Japan, use a prepaid eSIM from Ubigi with 10GB of LTE. Solid for short streams, but sketchy in underground areas. Sakura Mobile is another option, which offers better speeds but requires physical SIM swaps.
In NYC, T-Mobile + Verizon split between a phone and a hotspot device is pretty solid. This dual setup gives me a decent shot at a usable signal in most neighborhoods.
If you’re traveling internationally, check:
- Does the SIM support tethering/hotspot mode?
- Is it capped per day or per GB?
- Can you top up on the fly?
Bonding Multiple Connections with Speedify or LiveU Solo
If you want rock-solid uptime, no buffering, no dropouts, you’ll want to bond multiple networks into one connection. That’s where tools like Speedify or LiveU Solo come in.
Speedify
- Software-based, cheap, easy to use
- Bonds your phone’s cellular + Wi-Fi + a hotspot
- Great for solo streamers or DIY rigs
Official Speedify bonding guide
LiveU Solo
- Hardware-based, professional-grade
- Uses two to four modems at once for seamless, broadcast-level streaming
- Expensive (around $1K+) but extremely reliable
Quick Tip: Run a Pre-Stream Test Wherever You Are
Don’t assume a place has good signal just because your phone says “5G.” Before you go live:
- Run a 2-minute speed test
- Test audio quality
- Record a local backup (if your app allows it)
I always do a dry run, even just 60 seconds, to check if I’m going to glitch out mid-stream. The last thing you want is to spend your best reaction on a moment your audience never sees.
Best Apps for IRL Streaming
Once you’ve got gear and a solid connection, the next battle is finding an app that doesn’t crash, lag, or make your mic sound like it's under water. Mobile streaming apps are the command centers of IRL content.
Here’s what I’ve tried, what failed, and what finally stuck.
Streamlabs Mobile vs. Prism Live vs. Larix Broadcaster
Streamlabs Mobile
- Pros: Easy UI, built-in chat, alert integration, themes
- Cons: Resource-heavy, unstable with some phones, limited audio settings
Prism Live Studio
- Pros: Surprisingly stable, supports overlays, multi-streaming, built-in filters and effects
- Cons: Slight learning curve, less customization than OBS
If you’re IRL streaming from your phone and want the easiest combo of performance + features, Prism Live is my current go-to.
Larix Broadcaster
- Pros: Super customizable, very lightweight, pro-level audio/video controls
- Cons: No built-in chat, no alerts, very bare-bones UI
Larix is what streamers use when they want maximum control, bitrate, encoder settings, RTMP, latency tuning. But it’s not as beginner-friendly.
OBS for Mobile IRL Streams (If You’re Advanced)
For real pros (or masochists), you can run a mobile IRL setup into full OBS on a laptop via RTMP, NDI, or capture cards.
My friend does this with:
- A GoPro
- Speedify bonding to a mobile hotspot
- Streaming into OBS on a MacBook Air
It lets him use all his desktop alerts, scenes, chat bots, and plugins, but it’s a lot. Great when it works. Stressful when it doesn’t.
Yes, You Can Do Alerts and Overlays on Mobile
This part blew my mind. You can do overlays and alerts on your phone, without running OBS.
Here’s how:
- Streamlabs Mobile and Prism Live both support browser-based overlays
- Use tools like StreamElements, OWN3D, or Streamlabs overlays
- Add a browser source link (like your alerts or follower ticker) directly into the app
I have a simple “New Follower” overlay from StreamElements that auto-triggers in Prism Live. It makes mobile streams feel less barebones without needing a full desktop rig.
For full walkthroughs, Twitch’s official mobile streaming guide is solid:
👉 https://help.twitch.tv/s/article/mobile-broadcasting
Bottom line: your streaming app needs to be stable, flexible, and responsive. If it crashes even once, it's not worth the risk.
Stream-Friendly IRL Locations (And Red Flags)
The world is your backdrop, but not every place wants to be part of your stream. Before you turn that camera around you need to know where you can film legally, where it’s risky, and where your signal will betray you.
And yeah, I’ve tested all of the above. Let’s break this down so you don’t have to learn the hard way.
Public Spots Where Streaming Is Legal (and Ideal)
In the U.S. (and many other countries), you’re legally allowed to record video and stream in public places where there’s no reasonable expectation of privacy. That includes:
- Public sidewalks and streets
- Parks and beaches
- Outdoor plazas and town squares
- Tourist-heavy areas like Times Square or the Hollywood Walk of Fame
These are all fair game, and you don’t need special permission. In fact, IRL streamers thrive in these locations because:
- People are used to being on camera
- Backgrounds are dynamic
- Signal is usually solid
Also safe bets:
- Public transportation platforms (in most cities, but not inside moving vehicles)
- University campuses (outdoor spaces only; inside buildings is a gray zone)
Still, don’t be a creep. Keep the camera on you or the vibe around you. No zooming in on strangers, no filming kids without permission, and avoid private convos.
Places Where Signal Always Dies
Even legal spots can kill your stream if your connection can’t hang. Here are places I’ve rage-quit from:
- Basements: Doesn’t matter if it’s a cool ramen shop, no signal means no content.
- Inside big-box retail (Target, Walmart, etc.): Signal tanks, and staff will usually shut you down if they see a camera.
- Malls: Private property and metal-reinforced walls = streaming death trap.
- Subways: Platforms might be okay, but once the train moves, kiss your bitrate goodbye.
- Casinos: Most have a hard ban on recording. Security will find you fast. Ask any Vegas IRL streamer.
Portable Hotspots: The Secret Weapon for Travel Streams
Your phone’s 5G is nice until you hit a dead zone or get throttled. That’s why serious IRL streamers carry dedicated hotspots.
What I roll with:
Nighthawk M6 Pro (Netgear) - fast, reliable, SIM-swappable
Benefits:
- Keeps your phone cool by offloading hotspot duties
- Lets you bond multiple SIMs (if you’re using Speedify or LiveU Solo)
- Often gets better signal than your main phone
Legal Doesn’t Mean Welcome
So here’s where legal vs. allowed gets tricky.
A while back, I was streaming from a restaurant. Gorgeous... ambient lighting, jazz in the background. What I didn’t know was that the space had been rented out for a private event, and my streaming gear made me look like media coverage or something.
About 10 minutes in, a manager came over and asked me to shut it down or leave. Totally polite. But it still killed the stream.
What I learned:
- Restaurants, cafes, malls, and rooftops are private property. Even if they seem public
- If you’re inside any commercial space, you need permission
- Even if it’s legal to record, you can be asked to stop. And if you refuse, that’s trespassing
That’s why I now always stick to public spaces unless I’ve emailed or spoken to a manager in advance.
Know your location and its legal standing. If you’re unsure, stick to public spaces, test your signal, and avoid anything that feels sketchy. IRL streaming is already unpredictable, don’t add property law into the chaos.
IRL Streaming Etiquette and Safety
IRL streaming might feel casual and spontaneous, but once you're out in the real world with a live audience and a camera rolling, you’re juggling privacy, safety, and basic human decency. And yeah, sometimes alcohol-fueled chaos.
Whether you're in a park, a market, or just walking downtown, there’s a way to do this that keeps you, and your chat, out of trouble.
Don’t Be That Streamer: Consent Is Everything
Just because it’s legal to record in public doesn’t mean people are cool with being on camera.
Here’s my general rule:
If someone is the focus of the shot, get consent.
If they’re background blur, you're fine.
I’ve had people walk by and wave. I’ve also had people see the camera, frown, and dip out of frame. Respect that. If someone asks “Are you recording?”, don’t lie. Be chill. I would say:
“Yeah, I’m doing a live travel vlog! I can move the camera if you’d prefer.”
When to Go Stealth Mode: Audio-Only Streaming
Sometimes it’s smarter to keep your camera down and let your mic do the work. I do this in:
- Crowded trains or subways (tons of faces, zero consent)
- Religious or sacred sites (it’s respectful to go audio-only or stop completely)
- Sensitive areas like memorials, hospitals, or protests
If I need to stream but don’t want to put anyone on blast, I flip the camera to face-down mode or switch to a static overlay and just keep narrating. You’d be surprised how chat stays engaged, they like hearing your take, even without visuals.
Battery Anxiety Is Real: Build a Charging Rotation System
I used to think one power bank was enough. Spoiler: it’s not. If your battery dies mid-stream, you lose your audience.
Here’s the charging system I use now:
- Three power banks: One charging the phone, one charging the gimbal or mic, one charging in the backpack
- Short cables (1-2ft) to avoid spaghetti wires all over your rig
- Color-coded cables so I know which device is pulling what
Every time I take a break (bathroom, snack, bus ride), I swap the rotation:
- Dead bank goes on charge
- Half-used goes into the “next up” slot
- Fresh one plugs into gear
This sounds tedious, but its saved plenty of my streams. I ended with 12% phone battery but 80% on my backup bank. Victory.
Final Checklist Before You Go Live
IRL streaming isn’t just “hit record and vibe.” Once you step outside the safety net of your home studio, you’ve got no do-overs. If something fails on stream, it fails live... in front of your chat, potential new followers, and possibly a very confused pedestrian.
This is the checklist I personally run before every IRL stream:
Battery Level: Charge Everything (Then Charge It Again)
Before I even leave the house:
- Phone at 100%
- Power banks all charged and labeled
- Gimbal at full charge (seriously, nothing feels worse than your stabilizer dying mid-stream)
- Wireless mic packs fully juiced
I also plug everything into my backpack’s internal charger and do a quick 10-minute warm-up stream to test live draw. Better to find problems now than on the street with no outlets in sight.
Network Speed Test: Don’t Guess, Know
I never go live without doing a quick speed test in the exact spot I’m standing.
Apps I trust:
- Meteor by OpenSignal (easy readout, no fluff)
- nPerf (gives more technical detail)
- Speedtest by Ookla (default fallback)
You want at least:
- Upload speed of 4 Mbps minimum for 720p
- Closer to 6–8 Mbps for stable 1080p
If it’s borderline, I’ll drop my stream resolution before I go live to avoid mid-stream buffering.
Gear Check: One-Minute Pre-Flight Ritual
Right before I hit "Go Live," I run through this:
- Mic working? Tap it and check meter movement in the app.
- Camera framing good? Gimbal centered? Lens clean?
- Overlays loaded? Test alert (if using Prism or Streamlabs Mobile)
- Hotspot connected? Confirm it didn’t drop while setting up
- Battery check again (because yes, it can drop fast during setup)
Takes 60 seconds, and it’s saved me at least a dozen potential crashes.
Stream Title and Category: Set the Right Vibe
Too many IRL streamers forget this part. If you leave your title blank or stay in the wrong category, you’re invisible to people browsing Twitch.
What I do:
- Tag it properly (language, IRL, food & drink if applicable)
- Switch off Just Chatting if you’re doing:
- Food reviews → use Food & Drink
- Travel → use Travel & Outdoors
- Walking tours → use IRL
Write a stream title that tells a story
“Exploring the Night Market | Food Tour & Chatting”
Not only does this help with discovery, it sets expectations.
Listen, Stuff will go wrong but with the right setup and mindset, you’ll roll through it and come out with unforgettable content.
The world’s already out there doing its thing.
All you have to do is hit “Go Live.”


